


MECHANICAL SWITCHES
FROM JUST 12.95


Everything about switches
Mechanical switch, optical switch, Gateron, pre-lubed, tactile, and so on. The terms can be overwhelming on switch product pages. And there are quite a lot of them. When you're looking for new switches, it can sometimes be difficult to choose the right ones. To help you make your choice, we provide the necessary information on this page so you can choose the right switch, whether it's for the office or for gaming.
To begin with, you should ask yourself: “What kind of switch do I want?” Unfortunately, the answer is not that simple, as it depends on several factors, including the following:
- • What will you use them for? Mainly typing or gaming?
- • Do you prefer strong resistance while typing, or would you rather have a light keystroke?
- • What kind of sound do you want to hear while typing? Does your environment care what kind of sound your keyboard makes?
- • Do you want to replace all keys with a new switch, or only a few?
Mechanical keyboards
Recently, mechanical keyboards have been receiving more and more attention, and not without reason. Mechanical keyboards offer many possibilities. You can fully customize them to your liking so that the typing experience feels optimal. Take, for example, the real gamers among us; unscrewing a keyboard to customize the inside with duct tape in order to adjust the typing sound effect is nowadays the most normal thing in the world. The choice of hundreds of different keycaps also adds to the user’s enjoyment.
And of course, finally: the switches. There are also hundreds of different types available on the market. A selection of the most popular switches can be found at Ergowerken.
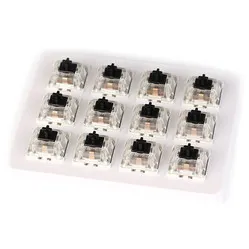
Different types of switches
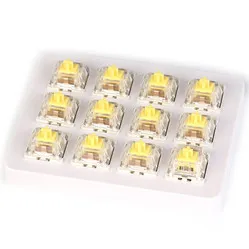
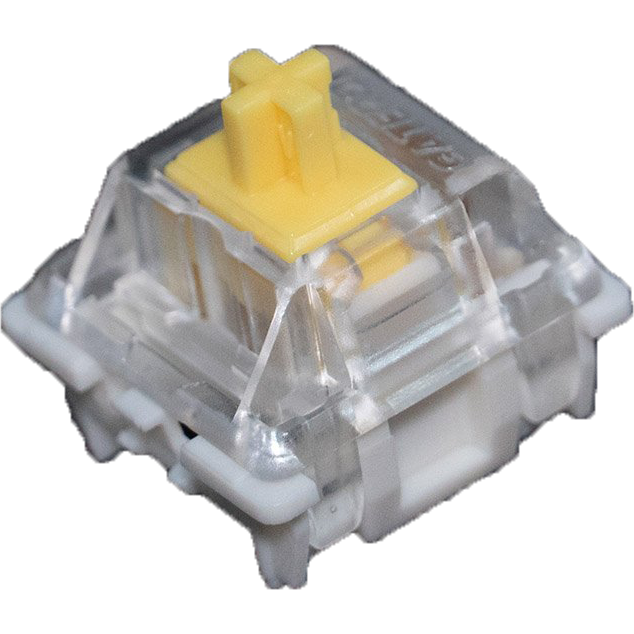
Linear
Straight down
Linear switches have the simplest operation. They move straight up and down without any tactile feedback or clicking sound. The smooth keystroke allows for fast movement, which is why linear switches are very popular among gamers.
The most popular linear switches at Ergowerken:
- Gateron red switch set
- Cherry MX speed silver
- Gateron yellow switch set
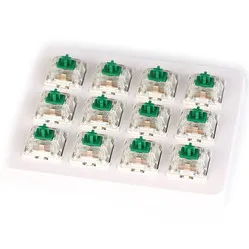
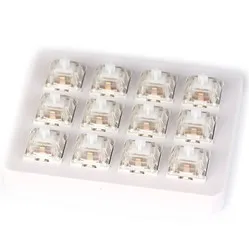
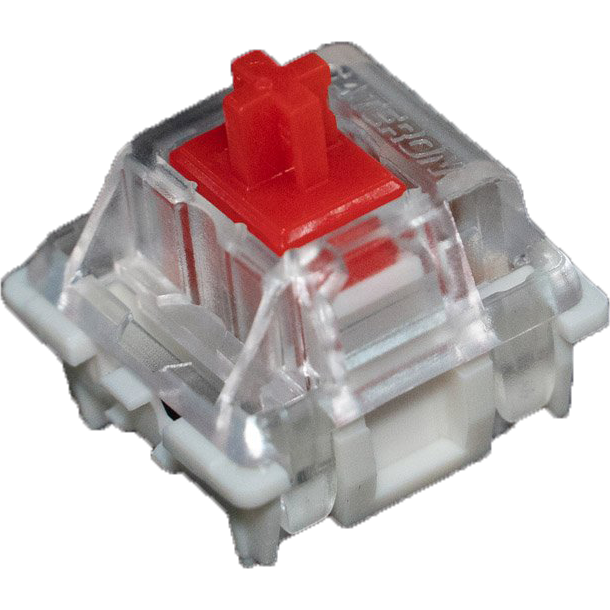
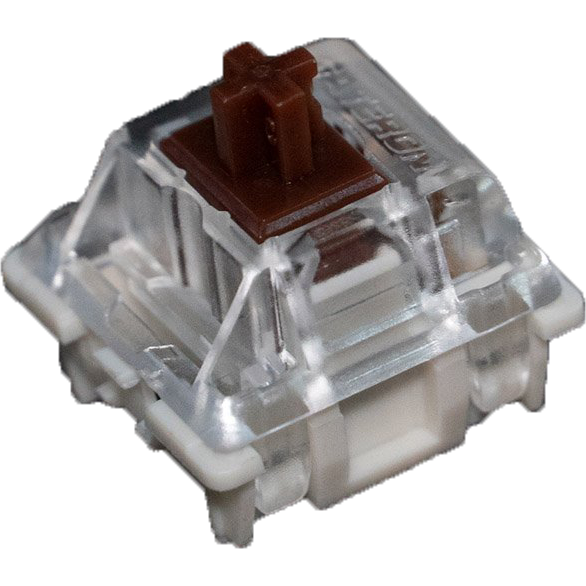
Tactile
Not without a struggle
Tactile switches provide slight resistance at the moment of actuation to indicate that the keystroke has been registered. There is a noticeable bump. They are ideal for typing because they give you an indication without requiring you to press the key all the way down.
The most popular tactile switches at Ergowerken:
- Cherry MX Switches Brown
- Gateron Brown switch set
- Gateron Cap Switches Brown
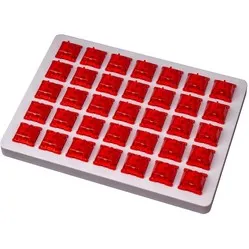
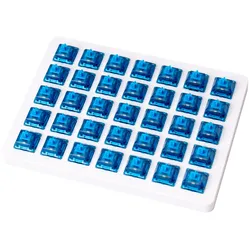
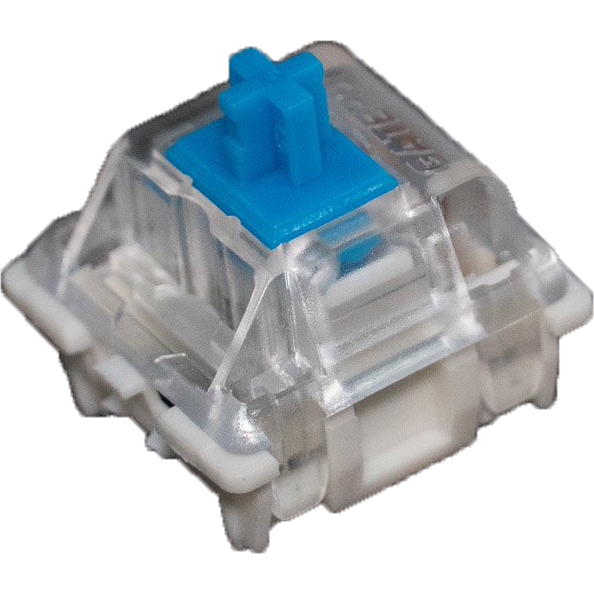
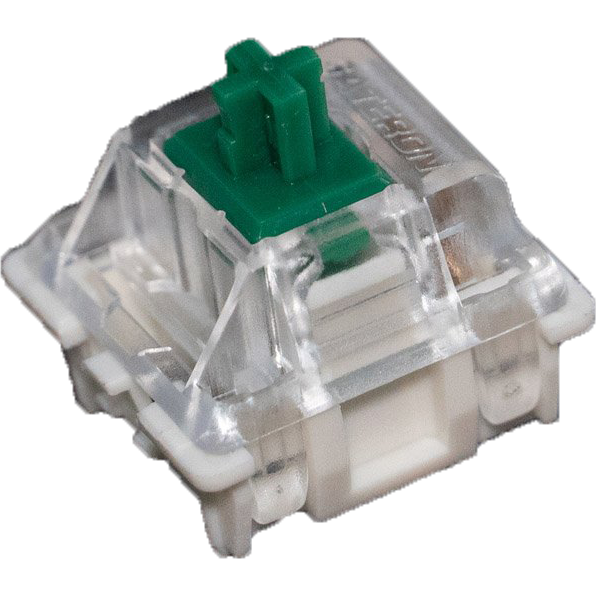
Clicky
Only do this around hard-of-hearing colleagues
Clicky switches work roughly the same as tactile switches, as they also have a noticeable bump. There is, however, one small difference: a clicking sound is added when the key is activated. Clicky switches are suitable for people who want to hear a clear indication of their keystroke or for those who want to retain the clicking sound.
The most popular clicky switches at Ergowerken:
- Gateron blue switch set
- Gateron Ink V2 Blue
- Cherry MX Switches RGB Blue
Characteristics of mechanical switches
Not only does the keystroke feel differ between switches, but several other characteristics are also involved. Depending on what suits you and your work, you can choose the right switch.
Force - The force (or Operating Force) indicates how hard you need to press the key. This is expressed in gram-force (for example 50gf).
Actuation point - Also called pre-travel. This is the point at which the keystroke is recognized by the keyboard. This is indicated in millimeters (for example 2.3 mm).
Maximum travel - Also called travel distance. This is the distance between the resting position and fully pressing the key. This is also shown in millimeters (for example 4.0 mm).
 |  |  |  |  |  |  |  |
| Color: | Red | Blue | Brown | Yellow | Green | White | Black |
| Type: | Linear | Clicky | Tactile | Linear | Clicky | Linear | Linear |
| Force (g): | 45 | 60 | 55 | 50 | 80 | 35 | 60 |
| Actuation point (mm): | 2 | 2.3 | 2 | 2 | 2 | 2 | 2 |
| Max. travel (mm): | 4 | 4 | 4 | 4 | 4 | 4 | 4 |
| Lifespan (clicks): | 50 million | 50 million | 50 million | 50 million | 50 million | 50 million | 50 million |
| Noise level: | |||||||
| Ideal for: | Office & gaming | Typing | All-round | All-round | Typing | Office & gaming | Office & gaming |
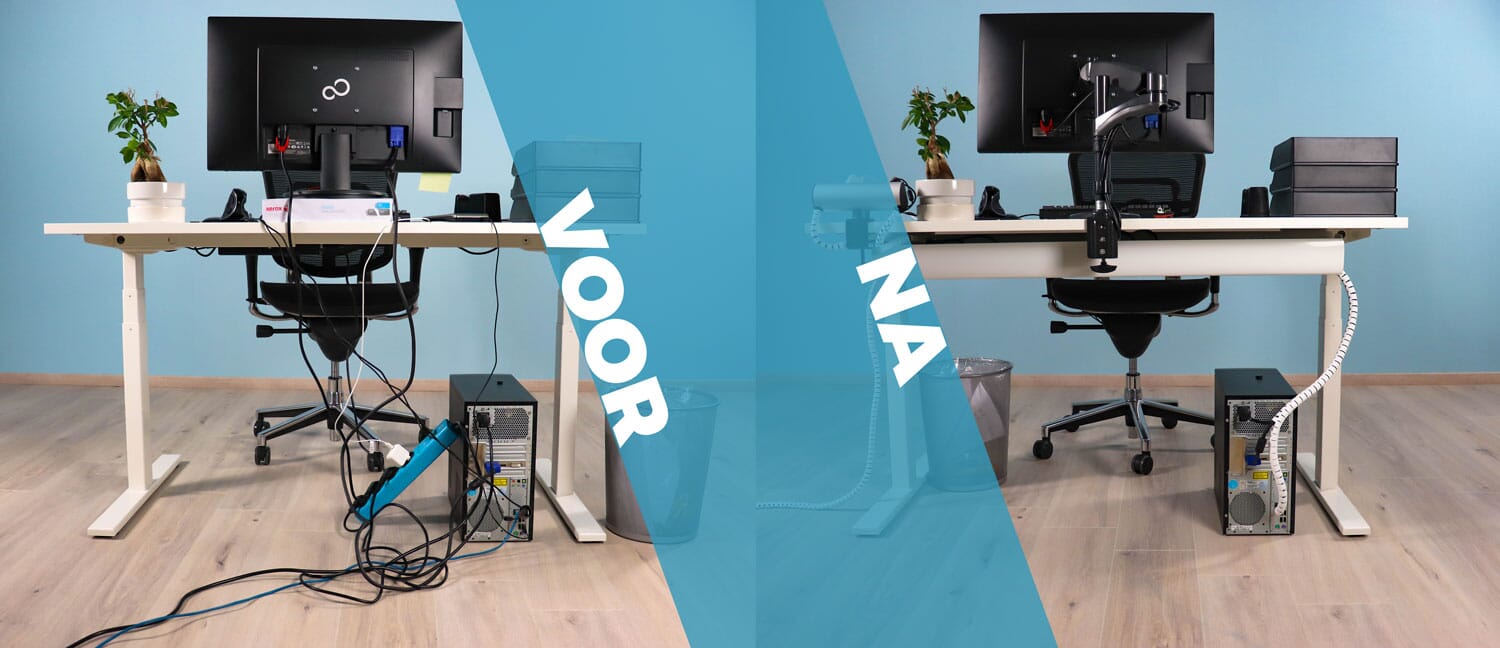
The pros and cons of keyboards with mechanical switches
Weight - A mechanical keyboard is generally somewhat heavier than other keyboards, which can be a disadvantage. However, it also means that more aggressive typists can be sure the keyboard will stay in place.
Keystroke - To register a keystroke, mechanical switches do not need to be pressed all the way down, which improves typing speed and means your fingers do not have to experience as much resistance.
Cleaning - The keys are easy to remove and therefore also easy to clean, for example with the help of compressed air.
Durability - Most mechanical keyboards are built for long-term use, and some are even so solidly built that you could pass them down to your grandchildren as an heirloom. In addition, every key works, always. The ‘E’ won’t stick because you spilled your mocha frappuccino over it, and you won’t need to press the ‘O’ harder than before just because you’ve used it so often to send that surprised smiley to your colleague :O.
Less resistance - After using a mechanical keyboard for a while, you start to notice when a key has been pressed far enough to register. As a result, you press the key all the way down less often and therefore experience less resistance on your fingers.
Less suitable in open offices - A mechanical keyboard can cause irritation if you share your office with colleagues. The loud clacking may sound like music to your ears, but your nearby colleague may feel differently.
Weight - Because a mechanical keyboard is often heavier than its competitors, it is not the most portable option.
Price - A mechanical keyboard is generally a more expensive option than other variants. This is partly due to the construction of a mechanical keyboard, which involves many components.
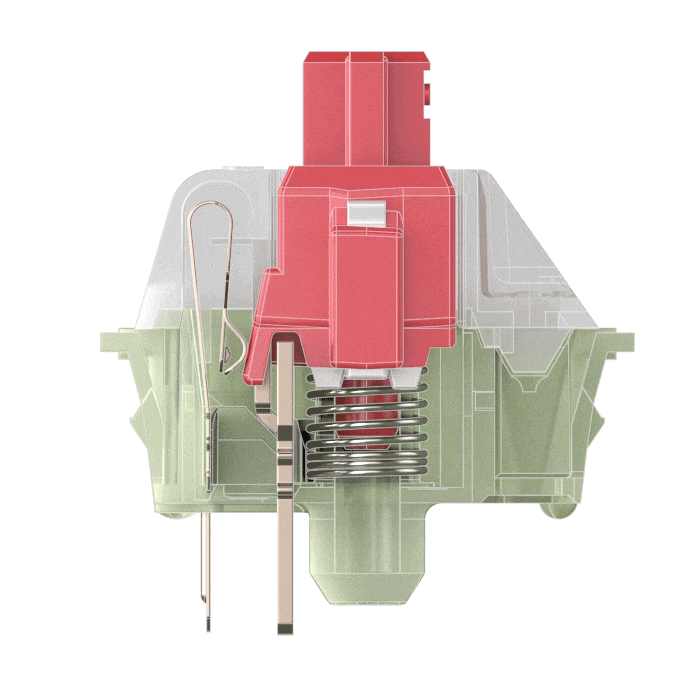
Construction and operation of mechanical switches
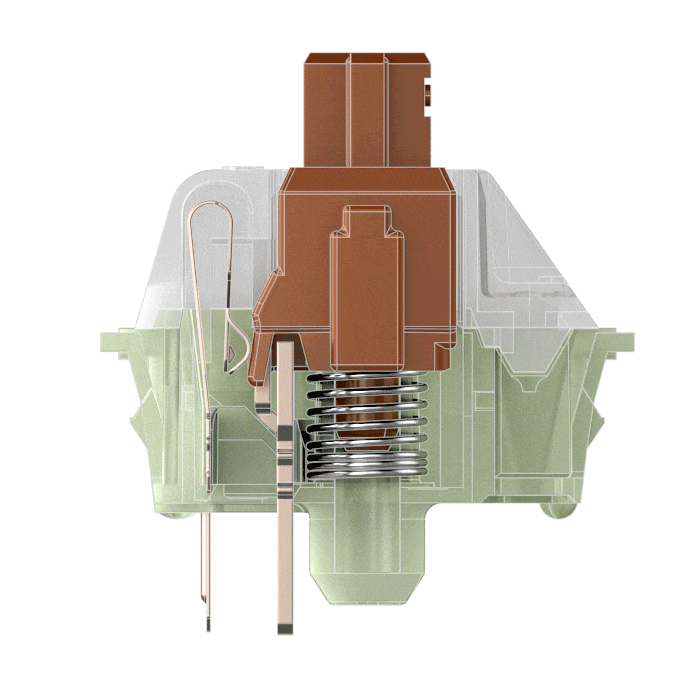
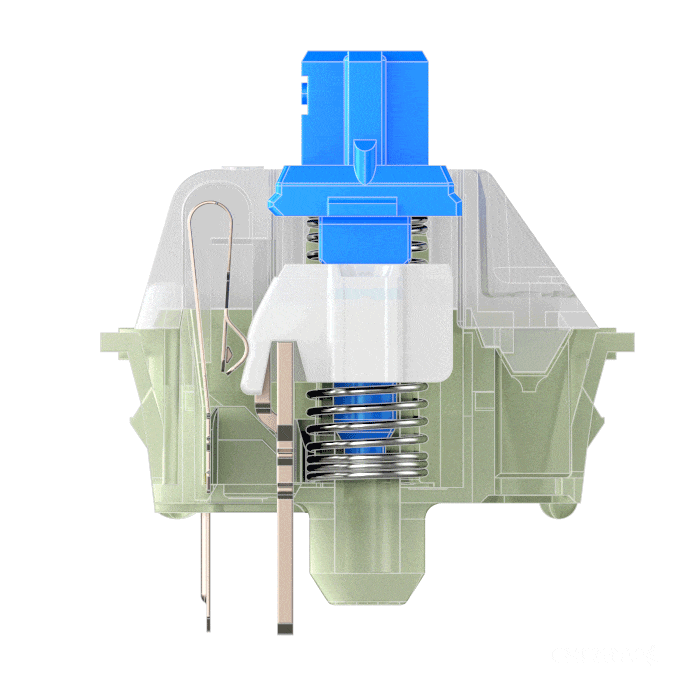
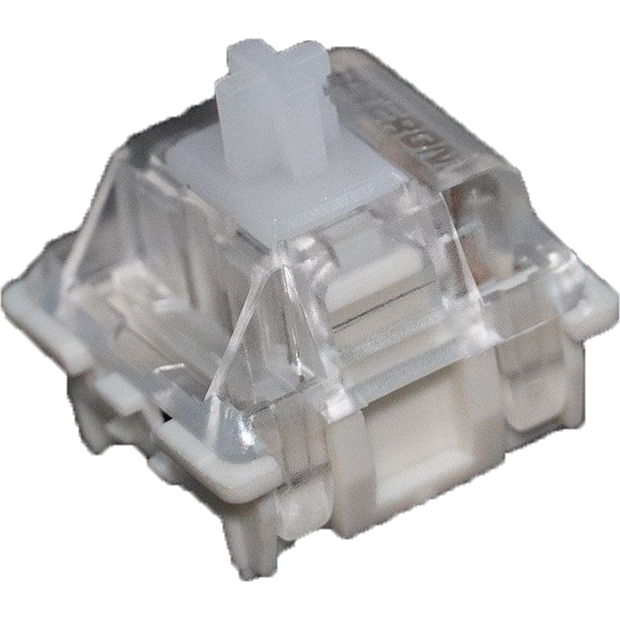
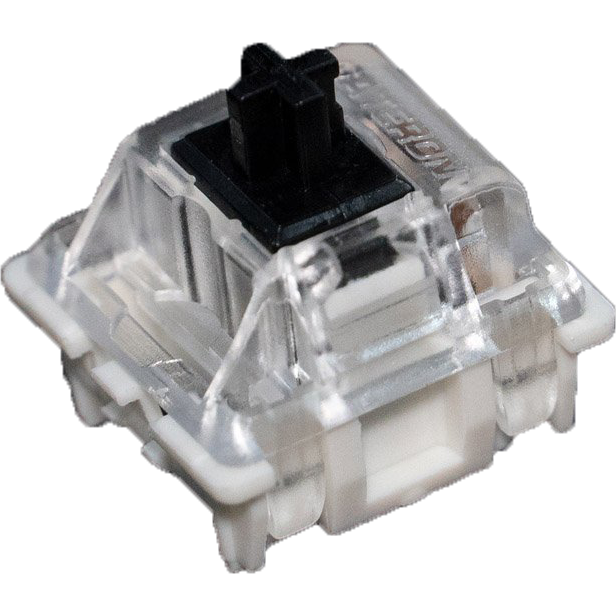
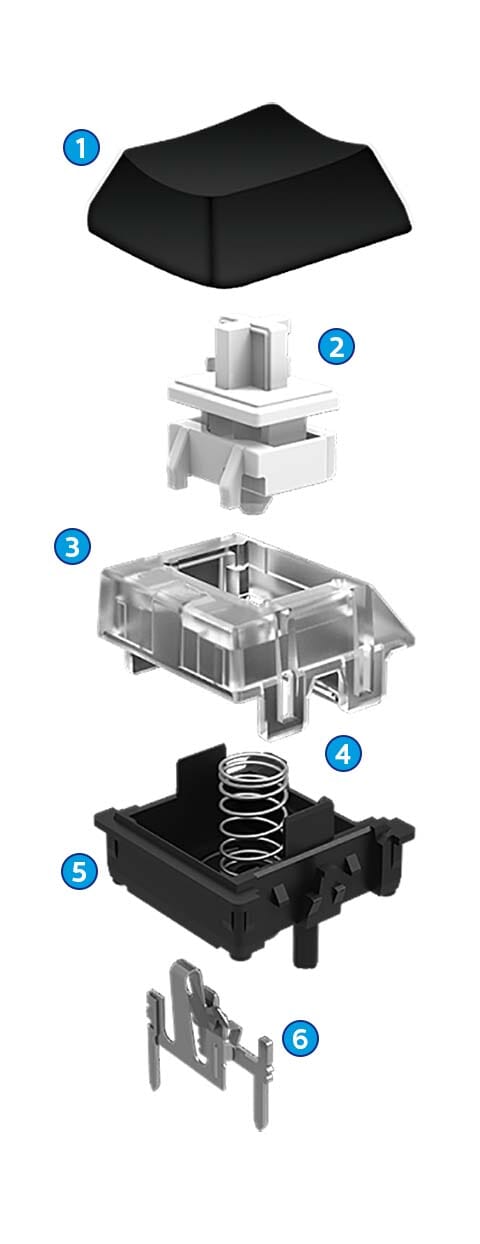
Mechanical switches are considered the ‘standard’ switches. There are also optical switches. Switches are the mechanisms hidden beneath the keycaps. When you press them, a keystroke is registered. Next to this text, you can see the structure of a mechanical switch (with a keycap on top) displayed. Click on a component to read the explanation.
- 1. Keycap
The keycap is not part of the switch. It is the top part of the key on which the letters are printed. The keycap is partly responsible for the sound generated while you type. Keycaps come in hundreds of different types and sizes.
- 2. Stem
The shape of the stem affects the operation and the travel distance of the switch. The stem determines the keystroke feel and defines the type (color) of the switch.
- 3. Top housing
The top part of the housing protects and guides the stem. This is also the part the keycap hits when you press it.
- 4. Coil spring
The coil spring is responsible for the amount of pressure needed to actuate the key. In addition, the spring ensures that the switch moves back upward after the key is pressed.
- 5. Bottom housing
This is where the top part of the housing is mounted. This is the piece that is attached to the PCB (printed circuit board).
- 6. Crosspoint contact
This is a small piece of metal through which electricity flows. As soon as you press the key, the crosspoint contact touches the PCB and closes the switching circuit, causing the keystroke to be registered.
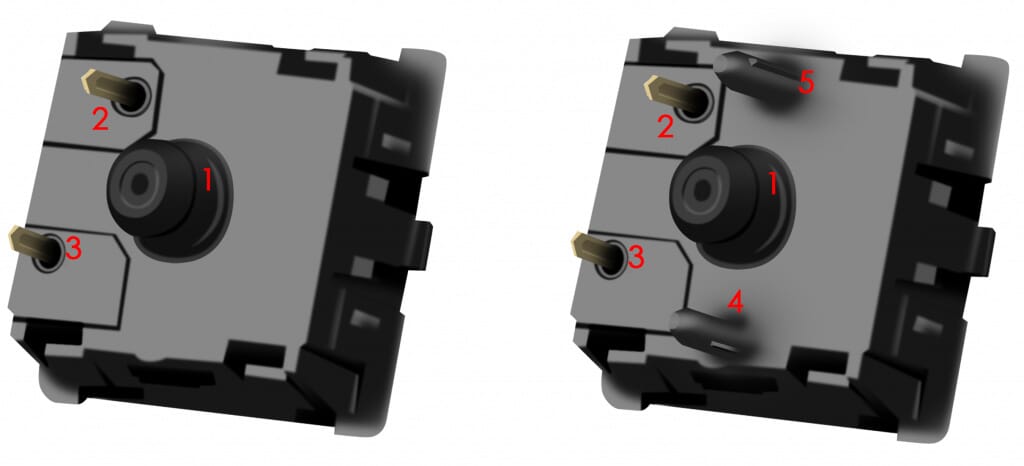
3-pin and 5-pin switches
When looking at mechanical switches, you may notice that, apart from switch color, there can also be a difference in the mounting style of the switch. For example, a mechanical switch can have 3 pins on the bottom, but also 5. In any case, a switch will have the following three: one thicker plastic pin in the middle and two thin metal pins. A 5-pin switch has two additional plastic pins, located on either side of the middle pin. These pins provide extra stability. If you want to use 5-pin switches in a 3-pin keyboard, you can cut off the extra plastic pins.
Difference between Gateron, Cherry and Keychron switches
When browsing the switches on our website, you will come across these three brands, among others. We can imagine you may wonder what the difference is between them, so we would be happy to explain.
In general, Keychron and Gateron switches are a bit more affordable than Cherry switches. Cheaper switches are perfectly usable, but they can show some flaws such as key chatter. Key chatter is an unwanted effect where a single keystroke results in multiple registered inputs. For example, if you type the word 'keyboard' on a keyboard with a defective 'N' key suffering from chatter, the result could be 'keyboarrd' or another unintended duplicate. In addition, the feel of the switches may differ slightly from one another. However, these flaws do not mean that Keychron and Gateron switches are not a good choice. On the contrary; Cherry switches are simply very high quality.
A large part of the mechanical keyboard range at Ergowerken comes standard with Gateron or Cherry switches. Even Keychron sometimes chooses to equip its own keyboards with these switches.
Lubing switches
To keep your switches nice and smooth, you can choose to lubricate them (lube them). Make sure you remove the switches from your keyboard first. You therefore need a hot-swappable keyboard, or you will have to remove the switches from your keyboard by desoldering them. We do not recommend lubricating clicky switches, because this can reduce the clicking sound (unless that is exactly what you want, of course). Lubricating linear and tactile switches is not a problem. Below you will find a step-by-step guide describing how to lube your switches.
- 1. Preparation
Gather your materials such as a brush, lube, switch opener, switch puller and tweezers. Then remove the keycaps. This can be done by hand or with a keycap puller. Usually, this puller is included with your keyboard. Tip: see this as a great opportunity to thoroughly clean your keyboard and keycaps at the same time ;-)
- 2. Removing switches from the keyboard
Next, remove the switches from your keyboard. This can easily be done with a switch puller if your keyboard is hot-swappable. If not, you will need to desolder the switches.
- 3. Opening the switches
Take the switches apart. There are different ways to do this, but personally we recommend using a switch opener. This minimizes the risk of damage. Place the switch in the opener in the correct way and apply gentle pressure. It should not require full force, though you may need to push a little. Then separate all the parts.
- 4. Lubing the switches
Then lubricate the parts listed below. This is best done with a small brush with soft bristles and a switch tweezer intended for that purpose. Use lubricant suitable for switches. Lightly dip your brush into the lube without fully covering the bristles. Keep in mind: “Less is more”.
• Lightly lube the two sides of the stem, as these are the parts that slide against the bottom housing. Lubing the front and back of the stem is therefore not necessary. Do not use too much lubricant, because that can make your switches feel mushy. A very thin film of lube on the switch stem and on the sliding parts of the housing is sufficient.
• The residue left on the brush can then be applied to the top and bottom of the coil spring.
• You may choose to lubricate the sides of the switch’s bottom housing, but this is not necessary. Experience shows that lubricating the bottom housing has little to no impact on the sound or feel of the switch. In addition, it saves you a lot of time if you skip it.
- 5. Reassembling the switches
Put your switch back together. Take the bottom housing, place the coil spring back in position and then place the stem into the spring. Finally, click the top housing back into place.
- 6. Putting the switches back into the keyboard
Place the switches back into their positions in the keyboard or solder them back in place.
Hot-swappable keyboards
If you have already explored the world of mechanical keyboards a little, you have probably come across the term Hot Swappable. Hot-swappable means that you can remove switches from a keyboard without desoldering them, and easily click new ones in. If a keyboard is not hot-swappable, you will have to use a soldering iron to replace the switches.
How can you tell whether a mechanical keyboard is hot-swappable? If you look at a keyboard at Ergowerken, it will always be stated on the product page. If you buy a keyboard somewhere else (online), this will most likely also be mentioned. Do you already have a keyboard and want to know? Then search Google for the product number or barcode of the keyboard; this often gives more information about the model. Still can’t find anything? You could try carefully removing a switch. If that works easily, your keyboard is most likely hot-swappable. If you cannot get any movement out of it at all, do not force it, and accept that the board is not hot-swappable :-(
Reviews from our customers about their mechanical switches
Frequently asked questions about switches
- What are mechanical switches?
Mechanical switches are the mechanisms located beneath the keycaps of mechanical keyboards. Switches come in different types and sizes and influence the typing experience. In addition to mechanical switches, there are also optical switches.
- Which switches should I use in the office?
In principle, you can use any switches. However, we recommend that you do not use "clicky" switches because they produce a clicking sound when pressed. This can be quite disturbing for people in your office. We recommend using linear or tactile switches.
- Which switches should I use if I do a lot of typing?
Most enthusiastic typists prefer tactile or clicky switches. Because these provide some resistance halfway through the press, the user receives feedback when a key has been registered. Only use clicky switches in an environment where the clicking is not considered disturbing.
- Which switches should I use for gaming?
In principle, you can use any switches. However, we recommend choosing linear switches if response speed in your game is important. Pressing a linear switch is relatively faster than pressing a tactile or clicky switch. You may also choose to equip certain keys, such as WASD, with different switches instead of changing the entire keyboard.
- What is the difference between optical switches and mechanical switches?
Just like mechanical switches, optical switches consist of various moving parts. However, the main difference is that optical switches do not contain metal contact points to register a keystroke, but instead use infrared light. The advantage of this is that production costs are lower. In addition, they last longer because no wear can occur between metal components.
- What does pre-lubed mean?
Pre-lubed means that the switches are already coated with a layer of lubricant (lube in English) during production. This ensures that your keys can be pressed smoothly. Usually, clicky switches are not pre-lubed (and we do not recommend doing this yourself either), because it can prevent them from making their clicking sound.
Are your switches not pre-lubed and would you like them to be? Then get started yourself with lube, a switch opener and a brush. Please note: lubing all your switches yourself is very time-consuming.
- My switches are not pre-lubed. Is it really necessary to do that myself?
We recommend doing this only if you have the time and materials, and if you value your switches feeling very smooth when typing. And by smooth, we really mean very smooth. It’s not as if unlubed switches sound like a shaky, rusty old grandma bike.
Also remember that "clicky" switches never need to be lubricated if you want to preserve the clicking sound.
- I’ve discovered what type of switch suits me. Now I see that there are many variants of that type as well. What are the differences?
Linear, tactile and clicky switches within the same category often all work the same way and feel similar. The difference between switches of the same type often lies in the amount of pressure required to press a key. This pressure can vary by brand or series of switches. It is usually expressed using the term "Operating Force", with the unit gf. For example: the red Gateron switches have an operating force of 45gf. That means 45 grams of pressure are needed to press the key all the way down.
In addition, there are switches that are not RGB-compatible. This means the housing of the switch is not transparent, so the RGB (backlight) of a keyboard does not shine through.
- I saw someone with a keyboard that had lights coming from the keys. Which switches were those?
The lighting you saw does not come from the switches but from the keyboard itself. It was probably a keyboard with RGB or white backlighting.